
Discover How to Protect Your Digital Identity and Embrace a Decentralized Future
Why You Need This Guide
- Privacy Invasion: Tired of stalking ads and lack of privacy.
- Data Security: Concerned about lax security and data breaches.
- Data Exploitation: Fed up with companies selling and trading your data for profit.
What You’ll Learn
- Secure Storage: How to securely store, send, and receive digital assets.
- Enhanced Privacy: Ways to control your digital identity and protect your privacy.
- Decentralized Applications: Introduction to dApps and their benefits.
- Self-Sovereign Identity: Understanding and setting up SSI for better identity management.
Take Action Now
Ready to take control of your digital life? Start by setting up your Web3 wallet today!
Web3 is Here – Let’s get started
The path from the 24/7 lights flashing “Gamora” that is Web2 is laid out behind us. Every flashing light is a call for you to pass your complete digital identity to them. They promise to protect your identity as best they can (with a wink and a nod), knowing that your data will be sold several times before there is a data breach that steals your data. You thinly protect this with the same username-password combo that you always use: User01-12345678.
For our sanity and our protection, the path to Web3 is laid out in front of us. Some of us came because we were tired of the stalking ads and the lack of privacy. Others came out of fear, knowing that all our personal information was loosely held behind lax security. Finally, we are all tired of companies selling, trading, and using our data for their bottom line.
We have heard of the power of blockchain encryption and know that its protection is better than what we have now. We are ready, willing, and able—if not overly eager—to take this amazing trek to Web3.
In this guide, we’ll walk together through the essential steps to embark on your Web3 Journey. Whether you’re a complete beginner or have some knowledge about blockchain technology, this guide will help you get started with Web3. From setting up a digital wallet to decentralized identification, and Self-Secured Identification (SSI) we’ll cover everything you need to know to dive into this exciting new world.
Let’s begin the amazing trek to a more open, secure, and user-driven internet!
Why Do You Need a Web3 Wallet?
A Web3 wallet is your gateway to the decentralized world of blockchain technology. Here’s why it’s essential:
Secure Storage of Digital Assets
A Web3 wallet allows you to securely store, send, and receive cryptocurrencies and other digital assets. Unlike traditional bank accounts, Web3 wallets give you full control over your funds without relying on intermediaries.
Enhanced Privacy and Control
With a Web3 wallet, you own your private keys, which means you have complete control over your digital assets. This eliminates the need for third parties, and username-password combos, and reduces the risk of hacks and breaches.
Access to Decentralized Applications (dApps)
Web3 wallets enable you to interact with decentralized applications (dApps) on the blockchain. Whether you want to trade on decentralized exchanges, participate in DeFi protocols, or explore NFT marketplaces, a Web3 wallet is essential
Using a Wallet Reduces Fees in Web3 For
- Everyday Users – Individuals who frequently send and receive money, whether for personal transactions or small business operations.
- Investors and Traders – Those who regularly trade cryptocurrencies and need to minimize transaction costs to maximize their returns.
- DeFi Participants – Users involved in decentralized finance (DeFi) activities such as lending, borrowing, and yield farming.
- Content Creators and Freelancers – Individuals who receive payments for their work and prefer lower transaction fees to retain more of their earnings.
- Global Remittance Senders – People sending money across borders who benefit from lower fees compared to traditional remittance services.
Why Are Fees Reduced
Transactions made through Web3 wallets can be cheaper compared to traditional banking systems for several reasons:
- No Intermediaries – Web3 transactions are processed directly on the blockchain without the need for banks or payment processors, which typically charge fees for their services1.
- Lower Operational Costs – Blockchain networks operate on a decentralized infrastructure, reducing the overhead costs associated with maintaining centralized systems2.
- Dynamic Network Fees – While blockchain transactions do incur network fees (also known as gas fees), these fees are often lower than traditional banking fees, especially for international transactions1.
- Efficiency – Blockchain technology can process transactions more efficiently, reducing the time and cost associated with each transaction2.
By leveraging Web3 wallets, users can significantly reduce the costs associated with financial transactions, making it a more economical choice for a wide range of activities.
Real-World Scenario
Sending $20,000 from Uruguay to the US
Traditional Banking System
Using a traditional bank for international transfers can incur several fees, including:
- Transfer Fees: Typically $35 to $50.
- Exchange Rate Markup: Banks often add a markup, reducing the amount received.
- Intermediary Fees: Additional charges may apply if the transfer goes through intermediary banks.
- Recipient Bank Fees: The recipient’s bank may also charge a fee.
These can total hundreds of dollars, significantly diminishing the recipient’s amount.
Using A Web3 Wallet
In contrast, sending $20,000 worth of cryptocurrency via a Web3 wallet is often more cost-effective:
- Lower Network Fees: Generally much less than traditional banking fees.
- No Intermediaries: Direct transactions on the blockchain eliminate extra charges.
- Transparent Exchange Rates: Cryptocurrency exchanges provide competitive rates.
By choosing a Web3 wallet, you will keep more of your money while benefiting from faster, more secure transfers.
Participation in the Decentralized Economy
Web3 wallets allow you to participate in various blockchain-based activities, such as staking, yield farming, and governance voting in decentralized autonomous organizations (DAOs).
Step 1: Choosing Your Web3 Wallet
In the old way, we relied on traditional bank accounts and online payment systems like PayPal, which involve intermediaries and can have higher fees and privacy concerns. Web3 involves setting up a digital wallet (e.g., MetaMask, Trust Wallet) that allows you to store, send, and receive cryptocurrencies and interact with decentralized applications (dApps).
To get started with Web3, you’ll need a digital wallet.
Here are three popular options:
- MetaMask: Ideal for developers and those looking to interact with Ethereum-based dApps.
- Trust Wallet: Great for beginners and those looking for a versatile wallet with staking and NFT support.
- Coinbase Wallet: Perfect for users who want a seamless integration with the Coinbase Exchange.
For a detailed comparison and to sign up, visit our Web3 Wallet Guide.
Trust Wallet Gets My Vote (1st)
I decided to go with Trust Wallet for my initial digital wallet. Trust Wallet’s support for a wide range of cryptocurrencies, including Bitcoin, Ethereum, and many others, was a major factor in my decision.
The user-friendly interface made it easy for me to navigate and manage my assets, even as a beginner. I was also impressed by the built-in dApp browser, which allows me to interact with decentralized applications directly from the wallet.
Additionally, Trust Wallet supports staking, enabling me to earn rewards on my crypto holdings.
One of the key features that sealed the deal for me was its compatibility with hardware wallets. Trust Wallet has integrated support for Ledger hardware wallets, which means I can keep my private keys completely offline while still accessing Web3 through the Trust Wallet browser extension. This combination of security and functionality gives me peace of mind, knowing that my assets are protected while I explore the decentralized world.
I am an affiliate for all three wallets. While I lean toward Trust Wallet, I strongly recommend MetaMask for Developers who will be working on the Ethereum network. Coinbase is for those simply wishing to trade crypto.
Trust Wallet Install
- Install Trust Wallet: Follow the instructions on the wallet’s website to install it as a browser extension or mobile app.
- Create an Account: Set up your wallet by creating an account. Make sure to securely store your seed phrase, as it is crucial for recovering your wallet.
After you sign up for Trust Wallet, you will be asked to download an extension. You are going to encounter the same Web2 options that you are familiar with: Chrome, Edge, Opera, and a new name on this list, Brave. Brave is the Web3 browser that most people are using. Some of you may have found DuckDuckGo or Tor, but Brave is special.

It’s a Brave New World
You will encounter the same Web2 options that you are familiar with: Chrome, Edge, Opera, and a new name on this list, Brave. Brave is the Web3 browser that most people are using. Some of you may have found DuckDuckGo or Tor, but Brave is special. It really is. I strongly urge you to cut the cord to Web2.
Brave is designed with privacy and security in mind, making it an excellent option for those who value these features. Here are some key benefits of using Brave:
- Privacy by Default: Brave blocks trackers, ads, and third-party cookies by default, ensuring your browsing activity remains private.
- Enhanced Security: Brave includes advanced security features like HTTPS Everywhere, script blocking, and fingerprinting protection.
- Built-In Crypto Wallet: Brave has a native crypto wallet that allows you to manage your digital assets without needing additional extensions.
- Decentralized Search: Brave Search is a privacy-focused search engine that doesn’t track your searches or build a profile on you.
- Faster Browsing: By blocking ads and trackers, Brave can load pages faster than traditional browsers.
- Support for Web3: Brave is designed to support Web3 applications, making it a seamless choice for interacting with decentralized apps (dApps) and services.
- Web2 Compatibility: Brave can navigate Web2 websites just like any other browser, so you won’t miss out on your favorite sites while enjoying enhanced privacy and security.
How to Install the Brave Browser
- Download Brave
- Visit the Brave website and download the browser for your operating system.
- Install the Browser
- Follow the installation instructions to set up Brave on your device.
- Set Up Your Wallet
- Once installed, you can set up the built-in Brave Wallet to manage your cryptocurrencies and interact with Web3 applications.
By choosing Brave, you’ll be aligning with your goal of moving away from Web2 and embracing a more private, secure, and decentralized web experience. If you need any further assistance with the setup, feel free to ask!
Step 2: Decentralized Identification and Self-Sovereign Identity (SSI)
As we move further into the Web3 world, managing your digital identity is the reason why you are here. Traditional Web2 systems require you to share personal information with multiple services, leading to privacy concerns and potential data breaches. Web3 offers a solution through decentralized identification and Self-Sovereign Identity (SSI).
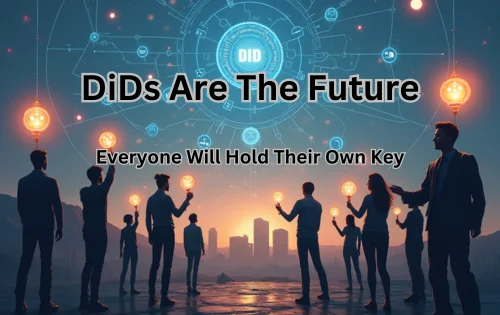
What is Self-Sovereign Identity (SSI)?
Self-sovereign identity (SSI) is a concept where individuals have full control over their digital identities. Instead of relying on centralized authorities to manage and verify your identity, SSI allows you to own and manage your identity using blockchain technology.
Benefits of SSI
- Enhanced Privacy: You control what information to share and with whom, reducing the risk of data breaches.
- Security: Your identity data is stored on the blockchain, making it tamper-proof and secure.
- Interoperability: SSI can be used across different platforms and services without needing to create multiple accounts.
- User Control: You have full control over your identity, including the ability to revoke access at any time.
Popular SSI Solutions
- Ethereum Name Service (ENS): Allows you to create a unique, human-readable name for your Ethereum address, making it easier to manage your digital identity.
- SelfKey: A decentralized identity system that enables you to manage your digital identity and securely share verified information.
- Ceramic Network: A decentralized platform for managing and sharing data, including identity information, across different applications.
- Sovrin: Sovrin is a dedicated self-sovereign identity (SSI) network that provides a global public utility for decentralized identity. It uses decentralized identifiers (DIDs) and verifiable credentials to give individuals control over their digital identities. Sovrin’s mission is to provide “Identity for All,” ensuring that everyone can manage their own identity securely and privately.
By adopting SSI, you’ll enhance your privacy and security while navigating the decentralized web. This step is essential for anyone looking to fully embrace the benefits of Web3.
How to Get Started with SSI
- Choose an SSI Solution: Decide which SSI solution best fits your needs. For example, ENS is great for simplifying Ethereum addresses, while SelfKey offers a comprehensive identity management system.
- Set Up Your Identity: Follow the instructions provided by the SSI solution to set up your digital identity. This usually involves creating a unique identifier and securing it with your digital wallet.
- Manage and Share Your Identity: Use your SSI to interact with Web3 services, ensuring you only share the necessary information and maintain control over your data.
Embrace the Future with Web3
Embracing Web3 means taking control of your digital identity and enhancing your privacy and security. By transitioning to decentralized solutions like digital wallets and self-sovereign identity, you empower yourself in a more open and user-driven internet. The journey may seem daunting, but with each step, you’ll enjoy the benefits of reduced costs, increased transparency, and greater autonomy over your digital life. It’s time to move forward into this exciting new era!
Spread the Word for Web3 Rescued
As we navigate the challenges and opportunities presented by Web3, initiatives like Web3 Rescued play a crucial role in fostering awareness and collaboration.
By spreading the word about the potential of decentralized technologies, we can empower individuals and communities to take part in this transformative movement.
Together, we can work towards a future where transparency, security, and user autonomy are not just aspirations but realities.
Join us in championing Web3 Rescued and be part of shaping a more equitable digital landscape for everyone.
Share this post and help others discover the power of Web3 and Web3 Rescued!
Let’s work together to build a decentralized future.